写在前面
一直想有个自己的个人主域博客来记录自己的生活&学习,刚好看到网上也有利用hexo和github来搭建的。虽然是渲染的是静态页面,但却可以省去主机等的麻烦,也是一件好事。
最好的效果就是:访问你的个人域名(your_domain_name.com)时,就会自动访问到github主页地址(your_github_name.github.io)。
动起手来
hexo
- hexo安装
1.安装node.js(http://nodejs.cn/download/);安装git
2.通过npm安装hexo,npm install -g hexo
3.在开发机上新建一个 文件夹 your_domain_name(或者其他名称能区分是博客即可)。进入文件夹,执行hexo init,初始化博客内容。文件夹内主要的三个文件&文件夹是:_config.yml站点配置文件source博客内容存放位置themes博客主题存放位置 - hexo命令
hexo n 新的博客.md新建博客hexo n page page.md新建栏目页面,比如【标签】【分页】hexo clean清除缓存hexo g本地生成博客静态文件hexo s启动本地访问服务,默认地址:localhost:4000hexo d将本地文件提交到github
github
- 创建个好听用户名的github账号,然后新建个repository,名称为: your_github_name.github.io
- 关联hexo的github主域地址。在 your_domain_name文件夹内的_config.yml中,设置:
1 | deploy: |
- 执行
npm install hexo-deployer-git –save
执行hexo ghexo dhexo s
即可以通过 localhost:4000 和 your_github_name.github.io访问 使用hexo默认主题生成的博客了。
github使用不同用户名提交
- 默认提交用户名
一般用git提交代码时,会设置一个默认的提交用户名
1 | $ git config --global user.name "your_github_com" |
但是有时候我们需要区分github&自搭建git服务等的用户名,这就需要单独进行提交用户名的设置。可在项目的.git文件夹下进行设置,即在your_domain_name文件夹内的.deploy_git/.git/config添加
1 | [user] |
虽然hexo-deployer-git的README.md中提到了另一种设置提交用户名的方式:
在your_domain_name文件夹内的_config.yml中添加name email
1 | deploy: |
但我在mac上设置后,hexo d后,提交的用户名还是~/.gitconfig内这个global设置的用户名,而不是_config.yml中设置的name。
购买域名
- godaddy域名购买
推荐使用godaddy购买域名,支持支付宝付款。
付款成功后,godaddy会向注册邮箱发送验证邮件,验证后,才能进行域名的相关设置。 - nameserver(域名服务器)设置
由于推荐使用dnspod作为dns服务,需要在账户中【我的产品】、域名【DNS】,将域名服务器更新为
1 | f1g1ns1.dnspod.net |
- 购买注意事项
1.在 https://account.godaddy.com/【账户设置】补全基本资料,默认货币选择USD;付款时,在付款页面最下角选择USD。这样在使用支付宝付款时,才能出现有效扫码付款弹框。
2.付款时去 https://www.dute.me/ 获取优惠码,新单可便宜35%。
dns服务器
- dnspod
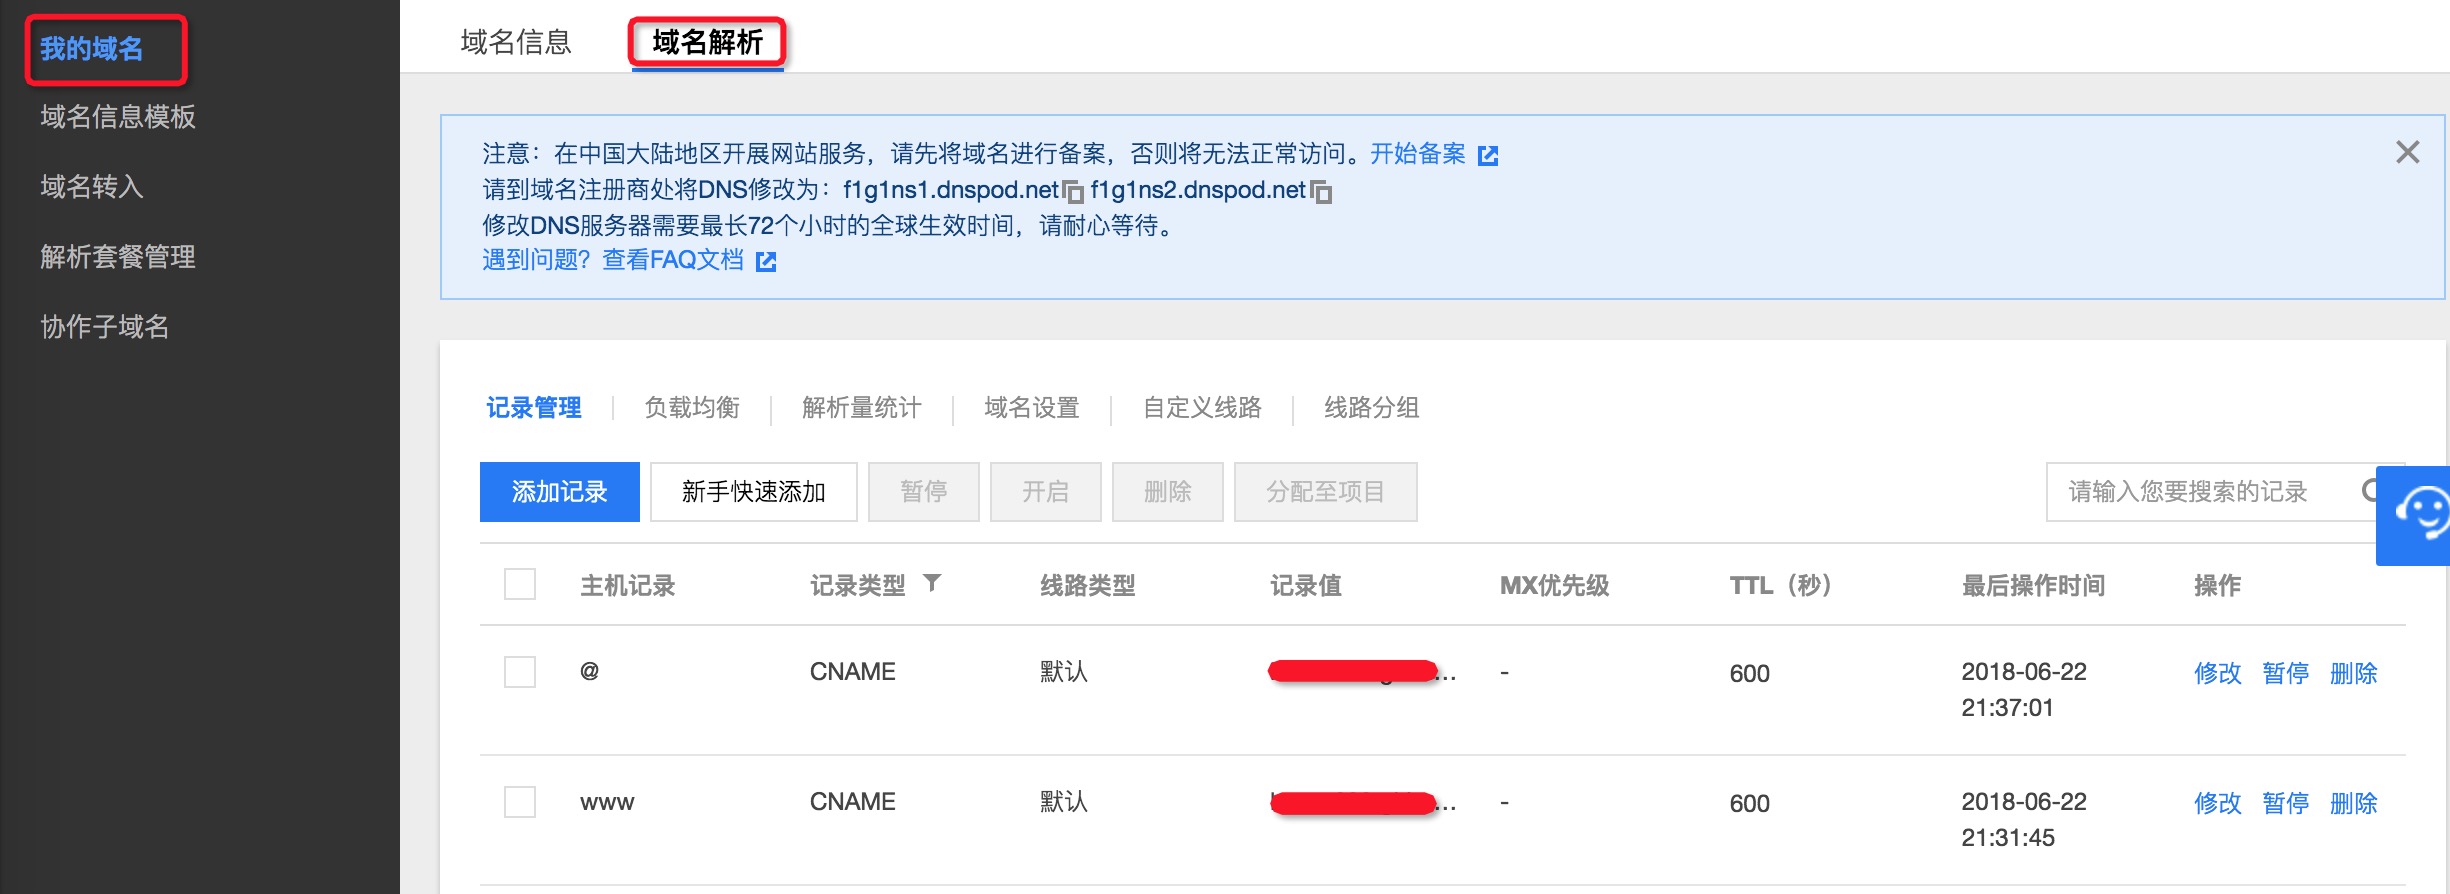
注册登录dnspod,访问【域名解析】(dnspod被腾讯云买了,腾讯的手真长),会让你【切换到腾讯云控制台】。跳转后,在【我的域名】处新增刚购买的域名,然后【添加解析】进行设置
设置主机记录为@www,那么以后访问时就可以通过 www.your_domain_name 或者 your_domain_name访问了。记录值为你的 your_github_name.github.io。
设置完上述内容后,即可重新部署,通过个人域名来访问博客了。
hexo Next主题
- Next主题获取
在your_domain_name文件夹内执行git clone https://github.com/iissnan/hexo-theme-next.git themes/next获取next主题
在根目录的_config.yml,设置theme: next - 新建tags(标签)页、categories(分类)页等
hexo n page tags新建tags页,后续所有博文内记录的tags都会显示在tags页上,其他类型。没有新建tags页,访问 your_domain_name/tags/ 就会404了。 - 新建博客
hexo n 新建博客.md即可使用markdown语法编辑新的博文
每个新建的博客都有默认的标题(title)、tags(标签)、categories(分类)等。如下:
1 | --- |
- 新建博客时的配置模板
在根目录下的/scaffolds/post.md文件中设置
1 | --- |
后面就可以为博客设置标签和分类了,比较方便。
- 去掉网页底部的Power by **字样
在根目录下themes/next/_config.yml中,设置
1 | footer: |